What gift to give to the person that already has all the toys? A place to keep them, of course!
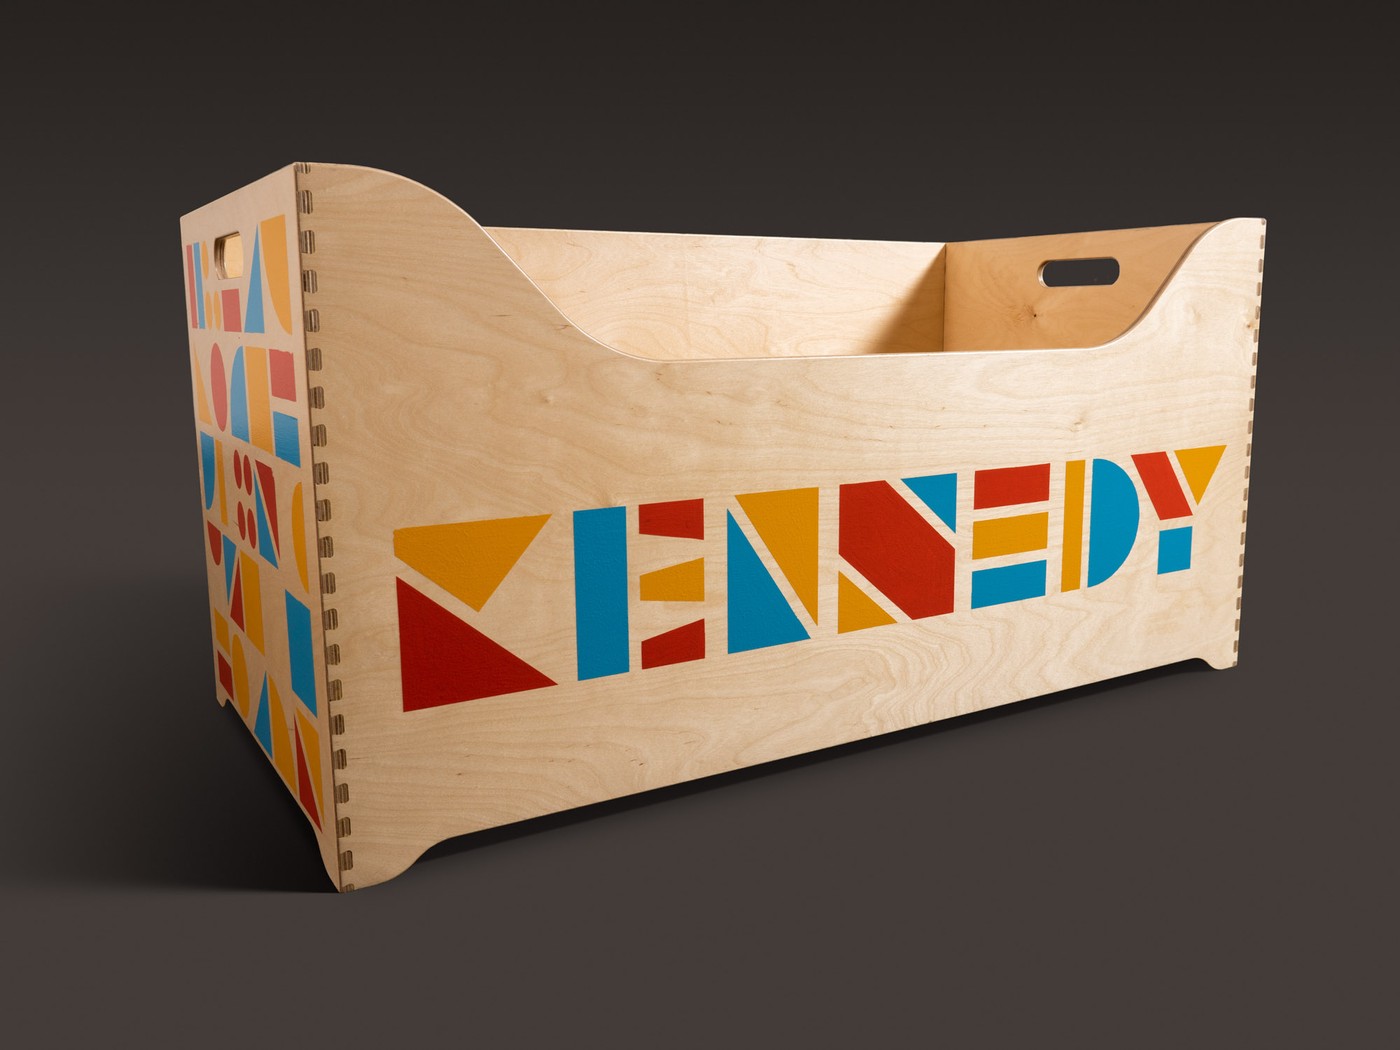
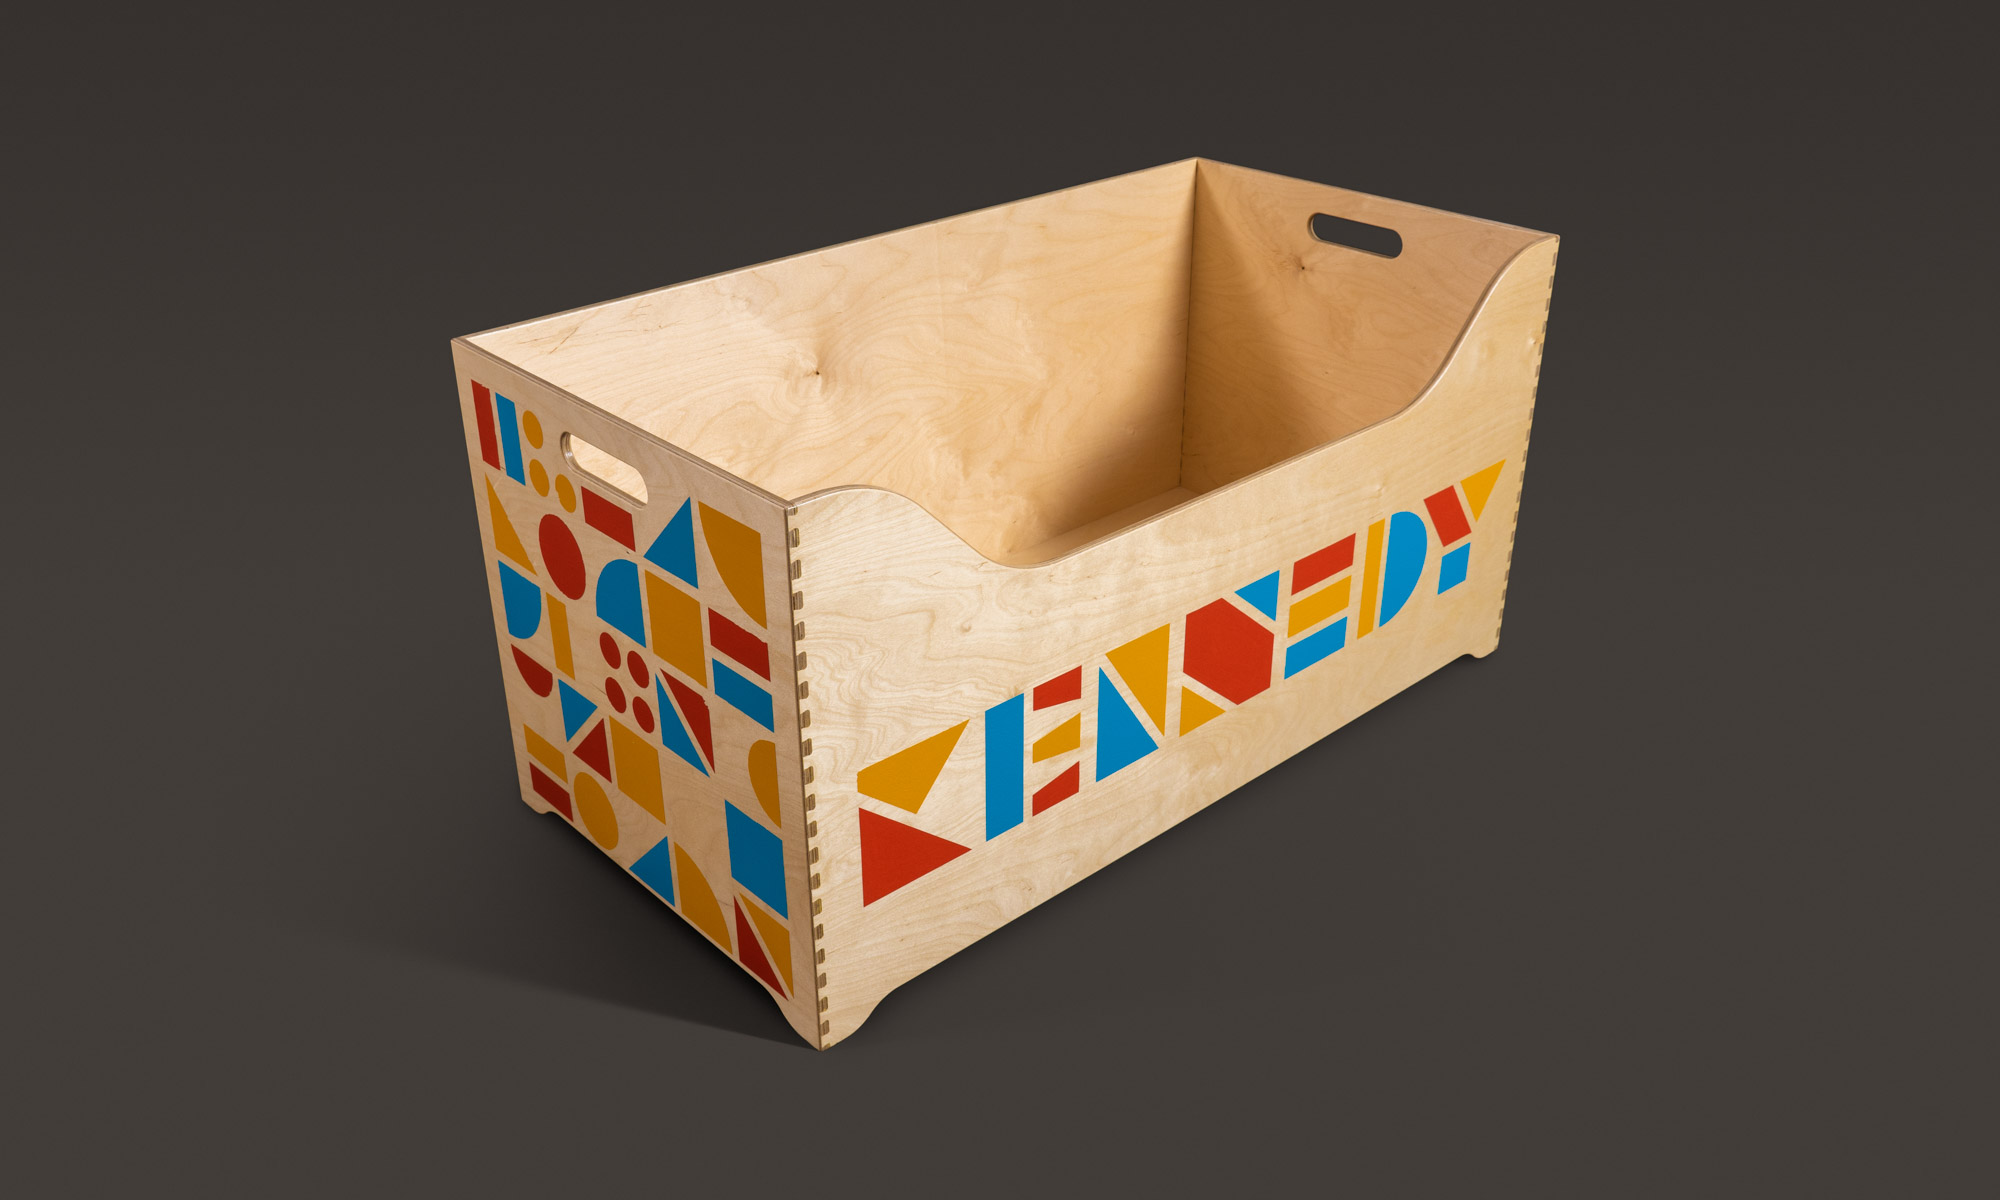
Baltic birch plywood is my goto material for many work projects and personal builds. So I drew up plans for a crate that would maximize material usage for one full sheet. Half-blind dovetail joints are a highlight of the construction, appearing to “zip up” the corners. A special bit for the CNC router allowed for the machine to handle all the precise work after several smaller test runs and revisions to dial-in the geometry.
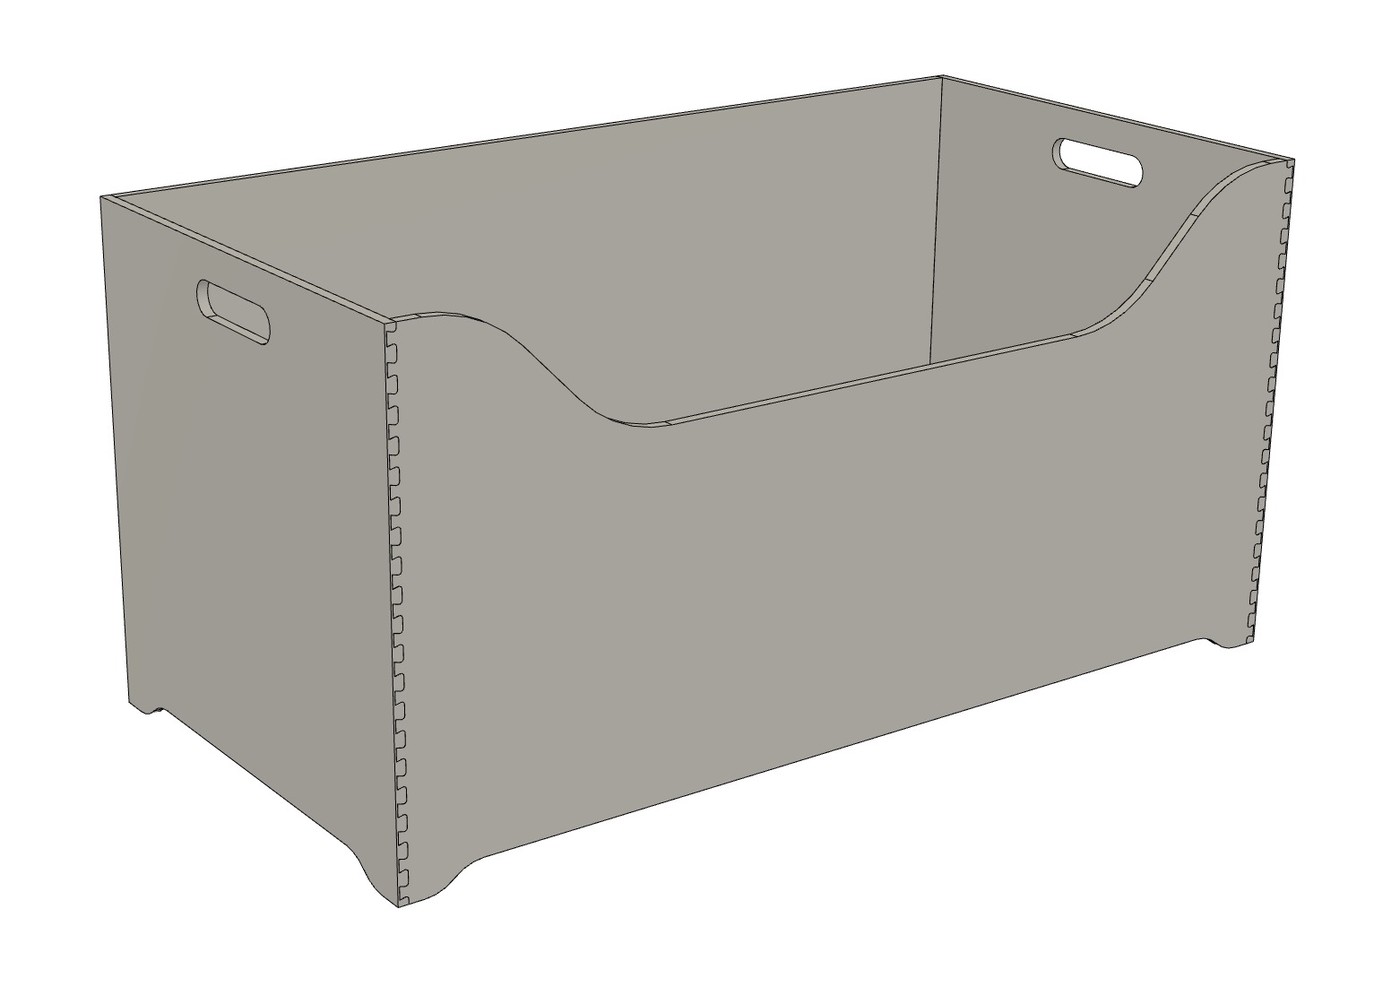

A bonus of the dovetail joints was that they held nice and square while gluing.

Once the box parts were assembled, it was time to jazz it up with a snazzy paint job. The 3D model provided a convenient source of accurate templates on which to design the stencils.
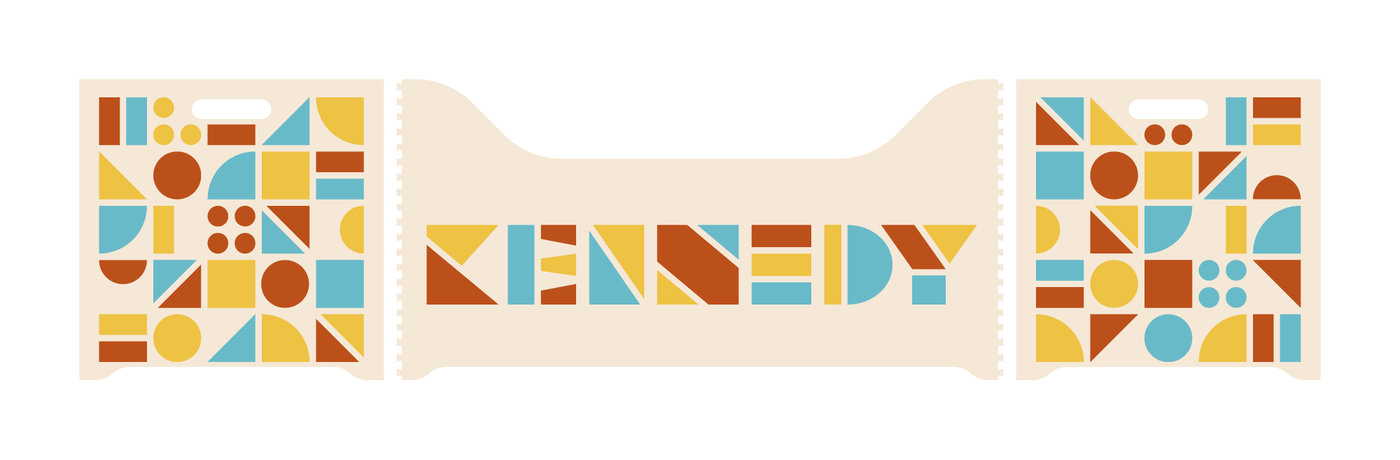
After laying out the shapes digitally they were cut out of vinyl paint mask which has a temporary tacky backing allowing it to be stuck to the box for painting then removed, leaving the painted shapes.
Though the colorful stencils visually popped, clear coated wood grain made for a subtle, but handsome, background and allowed the dovetail corners to shine in their own right.